---
title: Password reset
description: Learn how the password reset functionality works
sidebar:
order: 70
---
## Overview
The password reset feature consists of two actions: one in which a user requests a reset password link over email and another where the user sets the new password.
### The password reset forms
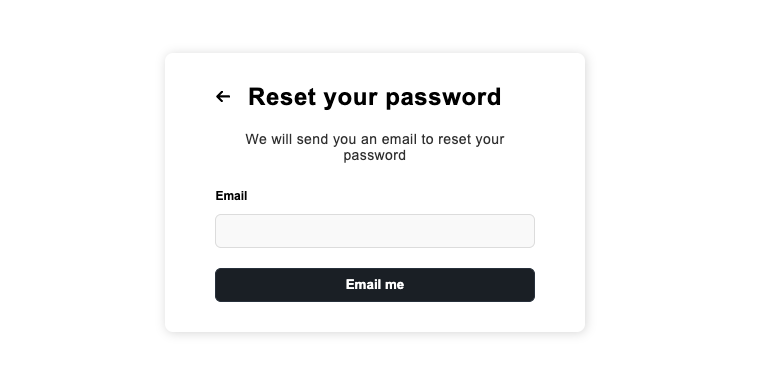
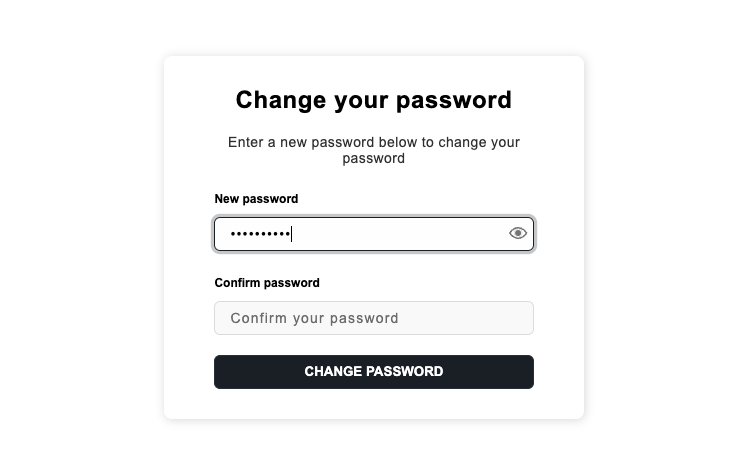
The following images show how the password reset forms render when you are using the pre-built UI.
**Reset Password**
You see this if you navigate to `/auth/reset-password`.
**Change Password**
You see this if you navigate to `/auth/reset-password?token=TOKEN`.
To implement your own interface create two different forms:
- One where the user requests a password reset link.
- Another one where the user changes their password.
Use the pre-built UI components as a reference.
### The password reset email
This is how the email that gets delivered to the learner looks like:
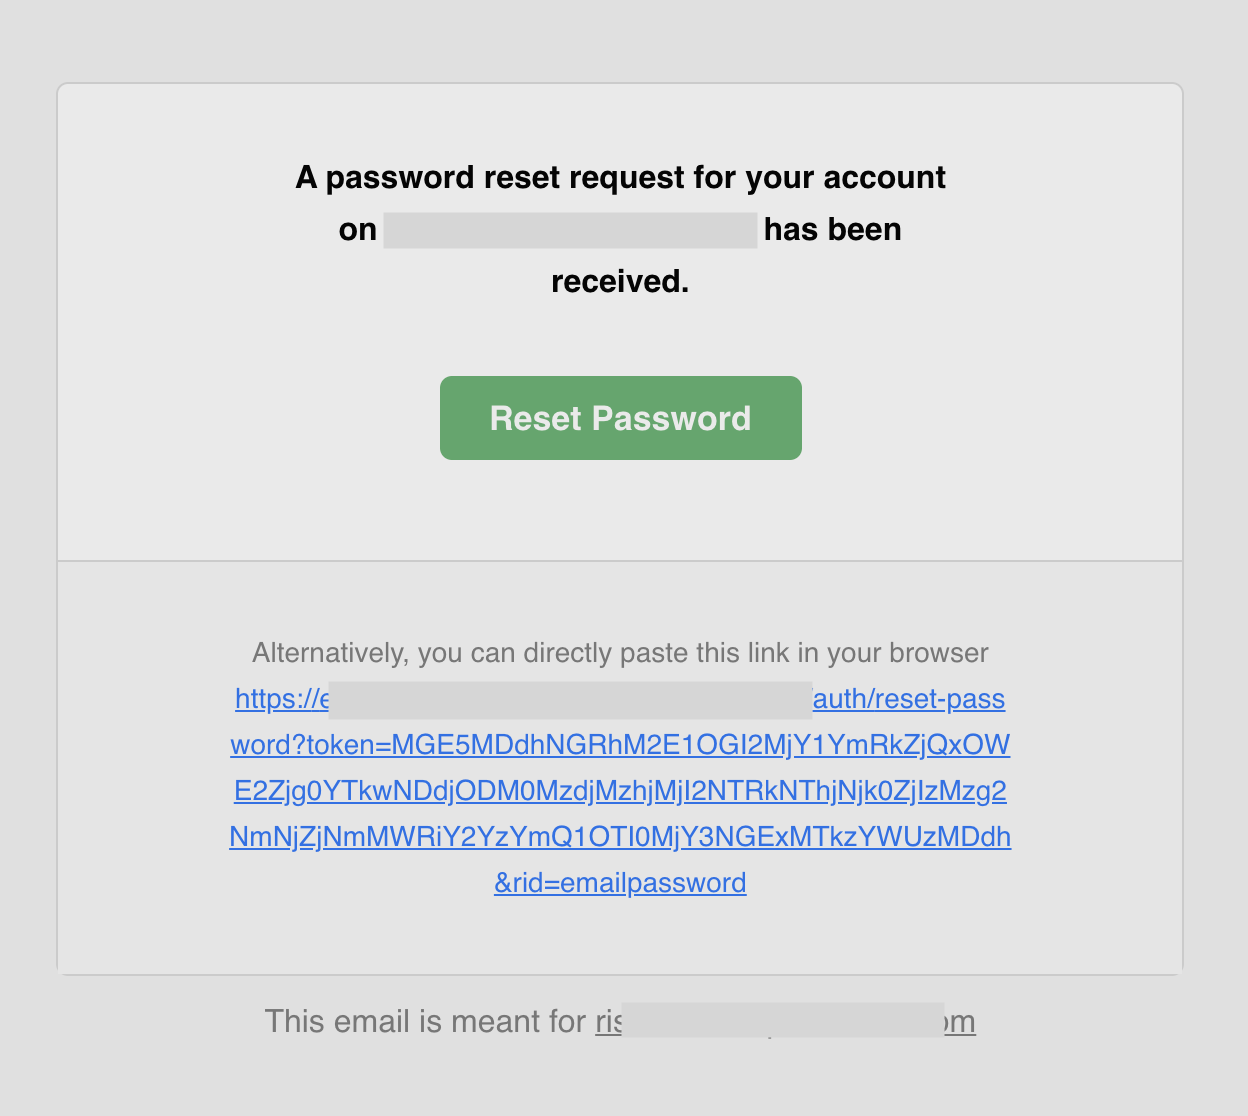 You can find the [source code of this template on GitHub](https://github.com/supertokens/email-sms-templates/blob/master/email-html/password-reset.html).
To customize the template check the [email delivery](/platform-configuration/email-delivery) section for more information.
---
## Embed the reset form in a page
To embed the reset form in a page you can use the next steps.
### 1. Disable the default implementation
```tsx
import SuperTokens from "supertokens-auth-react";
import EmailPassword from "supertokens-auth-react/recipe/emailpassword";
SuperTokens.init({
appInfo: {
apiDomain: "...",
appName: "...",
websiteDomain: "...",
},
recipeList: [
EmailPassword.init({
resetPasswordUsingTokenFeature: {
disableDefaultUI: true,
},
}),
],
});
```
```tsx check=false reason="This example omits surrounding application and SuperTokens configuration."
// this goes in the auth route config of your frontend app (once the pre-built UI script has been loaded)
supertokensUIInit({
appInfo: {
apiDomain: "...",
appName: "...",
websiteDomain: "...",
},
recipeList: [
supertokensUIEmailPassword.init({
resetPasswordUsingTokenFeature: {
disableDefaultUI: true,
},
}),
],
});
```
If you navigate to `/auth/reset-password`, you should not see the widget anymore.
### 2. Render the component yourself
Add the `ResetPasswordUsingToken` component in your app:
:::warning[You have to build your own UI for this.]
:::
```tsx
import React from "react";
import { ResetPasswordUsingToken } from "supertokens-auth-react/recipe/emailpassword/prebuiltui";
class ResetPasswordPage extends React.Component {
render() {
return (
You can find the [source code of this template on GitHub](https://github.com/supertokens/email-sms-templates/blob/master/email-html/password-reset.html).
To customize the template check the [email delivery](/platform-configuration/email-delivery) section for more information.
---
## Embed the reset form in a page
To embed the reset form in a page you can use the next steps.
### 1. Disable the default implementation
```tsx
import SuperTokens from "supertokens-auth-react";
import EmailPassword from "supertokens-auth-react/recipe/emailpassword";
SuperTokens.init({
appInfo: {
apiDomain: "...",
appName: "...",
websiteDomain: "...",
},
recipeList: [
EmailPassword.init({
resetPasswordUsingTokenFeature: {
disableDefaultUI: true,
},
}),
],
});
```
```tsx check=false reason="This example omits surrounding application and SuperTokens configuration."
// this goes in the auth route config of your frontend app (once the pre-built UI script has been loaded)
supertokensUIInit({
appInfo: {
apiDomain: "...",
appName: "...",
websiteDomain: "...",
},
recipeList: [
supertokensUIEmailPassword.init({
resetPasswordUsingTokenFeature: {
disableDefaultUI: true,
},
}),
],
});
```
If you navigate to `/auth/reset-password`, you should not see the widget anymore.
### 2. Render the component yourself
Add the `ResetPasswordUsingToken` component in your app:
:::warning[You have to build your own UI for this.]
:::
```tsx
import React from "react";
import { ResetPasswordUsingToken } from "supertokens-auth-react/recipe/emailpassword/prebuiltui";
class ResetPasswordPage extends React.Component {
render() {
return (
);
}
}
```
:::warning[Not applicable since you do not use pre-built UI.]
:::
### 3. Change the website path for reset password UI
This step is optional.
The default path for this is component is `/auth/reset-password`.
If you are displaying this at some custom path, then you need to add additional configuration on the backend and frontend:
#### 3.1 On the backend
```tsx
import SuperTokens from "supertokens-node";
import EmailPassword from "supertokens-node/recipe/emailpassword";
SuperTokens.init({
supertokens: {
connectionURI: "...",
},
appInfo: {
apiDomain: "...",
appName: "...",
websiteDomain: "...",
},
recipeList: [
EmailPassword.init({
emailDelivery: {
override: (originalImplementation) => {
return {
...originalImplementation,
sendEmail: async function (input) {
if (input.type === "PASSWORD_RESET") {
return originalImplementation.sendEmail({
...input,
passwordResetLink: input.passwordResetLink.replace(
// This is: `/auth/reset-password`
"http://localhost:3000/auth/reset-password",
"http://localhost:3000/your/path",
),
});
}
return originalImplementation.sendEmail(input);
},
};
},
},
}),
],
});
```
```go
import (
"strings"
"github.com/supertokens/supertokens-golang/ingredients/emaildelivery"
"github.com/supertokens/supertokens-golang/recipe/emailpassword"
"github.com/supertokens/supertokens-golang/recipe/emailpassword/epmodels"
"github.com/supertokens/supertokens-golang/supertokens"
)
func main() {
supertokens.Init(supertokens.TypeInput{
RecipeList: []supertokens.Recipe{
emailpassword.Init(&epmodels.TypeInput{
EmailDelivery: &emaildelivery.TypeInput{
Override: func(originalImplementation emaildelivery.EmailDeliveryInterface) emaildelivery.EmailDeliveryInterface {
ogSendEmail := *originalImplementation.SendEmail
(*originalImplementation.SendEmail) = func(input emaildelivery.EmailType, userContext supertokens.UserContext) error {
// This is: `/auth/reset-password`
input.PasswordReset.PasswordResetLink = strings.Replace(
input.PasswordReset.PasswordResetLink,
"http://localhost:3000/auth/reset-password",
"http://localhost:3000/your/path", 1,
)
return ogSendEmail(input, userContext)
}
return originalImplementation
},
},
}),
},
})
}
```
```python check=false reason="This example omits surrounding application and SuperTokens configuration."
from supertokens_python import init, InputAppInfo
from supertokens_python.recipe.emailpassword.types import EmailDeliveryOverrideInput, EmailTemplateVars
from supertokens_python.recipe import emailpassword
from typing import Dict, Any
from supertokens_python.ingredients.emaildelivery.types import EmailDeliveryConfig
def custom_email_deliver(original_implementation: EmailDeliveryOverrideInput) -> EmailDeliveryOverrideInput:
original_send_email = original_implementation.send_email
async def send_email(template_vars: EmailTemplateVars, user_context: Dict[str, Any]) -> None:
# This is: `/auth/reset-password`
template_vars.password_reset_link = template_vars.password_reset_link.replace(
"http://localhost:3000/auth/reset-password", "http://localhost:3000/your/path")
return await original_send_email(template_vars, user_context)
original_implementation.send_email = send_email
return original_implementation
init(
app_info=InputAppInfo(api_domain="...", app_name="...", website_domain="..."),
framework='...',
recipe_list=[
emailpassword.init(
email_delivery=EmailDeliveryConfig(override=custom_email_deliver)
)
]
)
```
#### 3.2 On the frontend
```tsx
import SuperTokens from "supertokens-auth-react";
import EmailPassword from "supertokens-auth-react/recipe/emailpassword";
SuperTokens.init({
appInfo: {
apiDomain: "...",
appName: "...",
websiteDomain: "...",
},
recipeList: [
EmailPassword.init({
// The user will be taken to the custom path when they click on forgot password.
getRedirectionURL: async (context) => {
if (context.action === "RESET_PASSWORD") {
return "/custom-reset-password-path";
}
},
}),
],
});
```
```tsx check=false reason="This example omits surrounding application and SuperTokens configuration."
// this goes in the auth route config of your frontend app (once the pre-built UI script has been loaded)
supertokensUIInit({
appInfo: {
apiDomain: "...",
appName: "...",
websiteDomain: "...",
},
recipeList: [
supertokensUIEmailPassword.init({
// The user will be taken to the custom path when they click on forgot password.
getRedirectionURL: async (context) => {
if (context.action === "RESET_PASSWORD") {
return "/custom-reset-password-path";
}
},
}),
],
});
```
:::warning[Not applicable since you do not use pre-built UI.]
:::
## Generate a reset link manually
You can use the backend SDK to generate the reset password link as shown below:
```tsx
import EmailPassword from "supertokens-node/recipe/emailpassword";
async function createResetPasswordLink(userId: string, email: string) {
const linkResponse = await EmailPassword.createResetPasswordLink("public", userId, email);
if (linkResponse.status === "OK") {
console.log(linkResponse.link);
} else {
// user does not exist or is not an email password user
}
}
```
```go
import (
"fmt"
"github.com/supertokens/supertokens-golang/recipe/emailpassword"
)
func main() {
userID := "..."
linkRes, err := emailpassword.CreateResetPasswordLink("public", userID)
if err != nil {
// handle error
}
if linkRes.OK != nil {
link := linkRes.OK.Link
fmt.Println(link)
} else {
// user does not exist or is not an email password user
}
}
```
```python
from supertokens_python.recipe.emailpassword.asyncio import create_reset_password_link
async def create_link(user_id: str, email: str):
link = await create_reset_password_link("public", user_id, email)
if isinstance(link, str):
print(link)
else:
print("user does not exist or is not an email password user")
```
```python
from supertokens_python.recipe.emailpassword.syncio import create_reset_password_link
def create_link(user_id: str, email: str):
link = create_reset_password_link("public", user_id, email)
if isinstance(link, str):
print(link)
else:
print("user does not exist or is not an email password user")
```
:::info[Multy-tenancy]
Notice that the first argument to the function call above is `"public"`. This refers to the default tenant ID used in SuperTokens. It means that the generated password reset link can only apply to users belonging to the `"public"` tenant.
If you are using the multi-tenancy feature, you can pass in the `tenantId` that contains this user, which you can fetch by getting the user object for this `userId`.
Finally, the generated link uses the configured `websiteDomain` from the `appInfo` object (in `supertokens.init`), however, you can change the domain of the generated link to match that of the tenant ID.
:::
---
## Change the reset's link lifetime
By default, the password reset link's lifetime is 1 hour. You can change this via a core's configuration (time in milliseconds):
```bash
# Here we set the lifetime to 2 hours.
docker run \
-p 3567:3567 \
-e EMAIL_VERIFICATION_TOKEN_LIFETIME=7200000 \
-d supertokens/supertokens-
```
```yaml
# You need to add the following to the config.yaml file.
# The file path can be found by running the "supertokens --help" command
email_verification_token_lifetime: 7200000
```
:::info
- For managed service, you can update these values in the **Configuration** page of the relevant deployment in the [SaaS Dashboard](https://supertokens.com/dashboard).
- This requires that your SuperTokens core version >= `3.6.0`
:::
---
## See also